How to Clean Headphones and Earphones Properly & Easily
We all know that headphones play a significant role in our daily lives, whether for immersive music experiences or tuning into online meetings. However, many may neglect the accumulation of dirt, oils, and bacteria that can affect the audio output and our well-being.
In this blog post, we’ll focus on how to clean headphones (like over-ear and on-ear models) and earphones, including in-ear monitors (IEMs) and earbuds. By following our simple cleaning tips, you’ll ensure crystal-clear sound and a hygienic audio companion.
Preparation

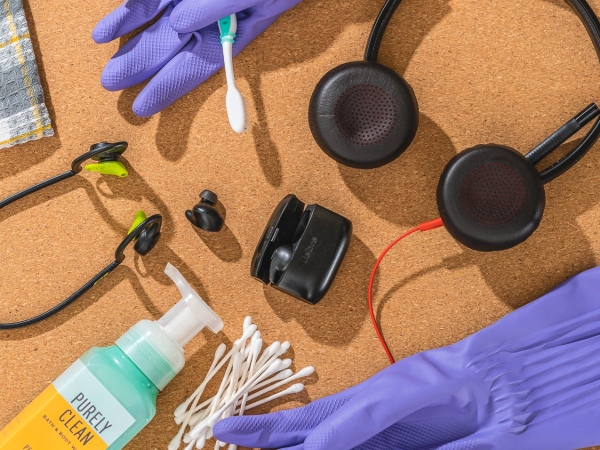
Before we proceed to the cleaning methods, ensuring you have the necessary materials to clean your headphones properly is important. Here are some items you’ll need:
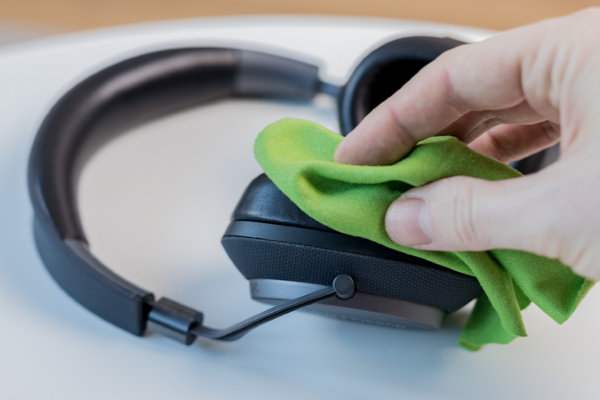
- Soft Cloth or Microfiber Towel: You’ll need a soft, non-abrasive cloth to remove dirt or dust without scratching or damaging the headphone surface.
- Toothbrush: You can use a dry, soft-bristled toothbrush to clean the nooks and crannies of your headphones.
- Cotton Swabs: Perfect for cleaning your headphones’ small and intricate parts, such as the ear cushions and earbuds.
- Isopropyl Alcohol helps remove stubborn dirt, grime, or germs from your headphones. However, use it sparingly and avoid using it on parts such as leather or vinyl, as it may damage or discolor the material.
- Dish Soap, Hydrogen Peroxide, or Diluted Bleach: These are effective for deep-cleaning your headphones, but use them carefully and follow the manufacturer’s instructions for diluting.
Now that we have the supplies, it’s time to begin cleaning.
How to Clean Earphones Easily
Earphones, including in-ear monitors (IEMs) and earbuds, require regular cleaning for optimal sound quality and hygiene. Let’s break down how to clean earphones into two major steps: cleaning the driver unit and ear tips.
Read more: IEM vs Earbuds: A Comprehensive Comparison
Cleaning the Driver Unit
- Start by removing the silicone or foam ear tips from the earphones.
- Take a soft cloth or a microfiber towel to softly wipe the driver unit (the small speaker inside the earphone) to remove any visible debris or earwax buildup. Be careful not to apply too much pressure or push dirt into the driver unit.
- If stubborn dirt or grime is on the driver unit, dip a cotton swab in isopropyl alcohol and gently clean the surface. Remember to moisten the cotton swab to avoid excessive moisture lightly.
- Allow the driver unit to dry completely before reattaching the ear tips. That will prevent any water or moisture from damaging the electronic components.
Cleaning the Ear Tips

Step 1: Remove the ear tips from the earphones.
Step 2: Inspect the ear tips for any visible debris or earwax buildup. Take a soft cloth or a microfiber towel to clean away any dirt, if necessary, gently.
- For silicone ear tips, you can wash them with mild dish soap and warm water. Scrub them slightly with your fingers to remove any dirt or oils. Rinse thoroughly and leave them dry completely before reattaching to the earphones.
- It’s best to replace foam ear tips as they are not washable. Foam tips degrade over time and lose effectiveness, so having new ones on hand is a good idea.
Step 3: Once the ear tips are dry or replaced, reattach them to the earphones securely. Ensure they are clean and free of any dirt or debris.
Remember to clean your earphones regularly, especially if you use them frequently or in environments with high humidity. By following these steps, you’ll enjoy crisp sound quality and maintain a hygienic audio experience. In the next section, we’ll dive into the cleaning process for larger headphones, such as over-ear and on-ear models.
How to Clean Headphones: A Comprehensive Guide
Headphones, including over-ear and on-ear models, require cleaning for hygienic reasons and maintaining excellent sound quality. Let’s walk through how to clean headphones, broken down into two important steps: cleaning the driver unit and the headphone pads and headbands.
Cleaning the Driver Unit
- Start by wiping down the driver unit (the speaker inside the headphones) with a soft cloth or a microfiber towel to remove any visible dirt or dust. Avoid excessive moisture or cleaning agents, which could damage the electronic components.
- If stubborn dirt or grime is on the driver unit, dip a cotton swab in isopropyl alcohol and gently clean the surface.
- Allow the driver unit to dry completely before using your headphones. Never use your headphones while they are still wet.
Cleaning Headphone Pads and Headbands

Step 1: Remove any cushions or pads from the headphones, including the headband, if it’s detachable.
Step 2: Take a soft toothbrush or cloth to gently remove any visible dirt or hair from the pads and headband.
Step 3: Clean the head pads
- Combine a decent amount of mild dish soap with warm water for leather and vinyl pads, and use a sponge or cloth to clean the surface. Be sure to avoid saturating the material with water, which could cause damage or discoloration.
- For fabric or mesh pads, you can wash them using mild dish soap with warm water. Be sure to squeeze the excess water out and avoid drying them with direct sunlight or using a machine dryer.
Step 4: Follow the manufacturer’s instructions for detachable headbands, and use a mild cleaning agent if necessary.
Step 5: Allow the pads and headbands to dry completely before reattaching them to the headphones. That will avoid any water damage to the electronic components.
Regularly cleaning and maintaining your headphones will ensure they last longer and perform at their best. Follow these simple steps to keep your headphones clean and hygienic, and enjoy the crisp, clear sound quality you love.
Useful Tips to Clean Headphones Easily
While cleaning headphones, there are some useful tips to help you maintain clean and optimal performance. You can incorporate these tips into your cleaning routine to enjoy a clean, hygienic, and optimal listening experience.
Tip 1: Get a Hearing Aid Vacuum
Investing in a hearing aid vacuum or a specialized headphone cleaning tool can effectively remove dirt, dust, and debris from hard-to-reach places. These handheld devices use gentle suction to clean the driver units, ensuring that your headphones remain free from blockages that can affect sound quality.
Tip 2: Clean Headphone Jacks

The jack can accumulate dirt and lint over time, leading to poor audio connection or intermittent sound. To clean the headphone jack, you may use a small, soft-bristled brush or a clean toothbrush to remove debris gently. Ensure the device is powered off, and avoid using liquids that could damage the headphone jack.
Tip 3: Ear Pad Replacement
Ear pads tend to accumulate dirt, oils, and sweat over time, affecting your headphones’ comfort and hygienic condition. If your headphones have removable ear pads, consider replacing them periodically. It will improve your listening experience and ensure a clean and fresh fit.
Tip 4: Cleaning Your Ears
One often overlooked aspect of headphone maintenance is cleaning your ears regularly. Regular ear cleaning helps prevent excessive wax buildup, which can get transferred onto the earbuds or earpads of your headphones. Keeping your ears clean can reduce the amount of debris accumulating on your headphones and maintain better sound quality.
FAQs
To clean your headphones, you can clean the surface using a soft cloth or a microfiber towel. For stubborn dirt, a cotton swab dipped in isopropyl alcohol can be used. Investing in a hearing aid vacuum or specialized headphone cleaning tools can effectively remove dirt and debris from hard-to-reach places.
Washing headphones, especially when submerging in water, is generally not recommended. However, detachable parts like ear pads can be washed according to the manufacturer’s instructions. Avoiding excessive moisture on electronic components is important to prevent damage.
It is generally safe to use alcohol wipes to clean the outer surfaces of your headphones. However, it’s important to avoid excessive moisture and ensure the alcohol does not come into contact with the electronic components.

To clean sweaty earphones, use a soft cloth or microfiber towel to wipe away any moisture or sweat. If the earbuds are removable, you can wash them with mild soap and water, ensuring they are completely dry before reattaching them.
Sweat won’t necessarily ruin headphones, but excessive moisture can damage electronic components over time. Always choose sweat-resistant models for workouts and clean them regularly to prevent this issue.
If you don’t clean your headphones, they can accumulate bacteria, earwax, and dirt. That can degrade sound quality over time, potentially leading to ear infections or skin irritations.
Conclusion
Regular cleaning of your headphones is essential for maintaining optimal sound quality and hygiene. We hope the tips in this article have helped guide you on how to clean headphones and earphones effectively.
Remember, neglecting to clean your headphones can lead to a buildup of dirt, debris, and sweat, which can affect audio performance, shorten the lifespan of your headphones, and pose hygiene concerns. So, why not take action today? Grab a soft cloth and some alcohol wipes, and clean those headphones!
Also, don’t forget to share your experience in the comment section below. We would love to hear your feedback and any additional tips and tricks you may have discovered.
Tony, an experienced engineer and tech enthusiast, brings his expertise to Hometoppicks, where he oversees the Electronics and Entertainment Equipment sections. With his hands-on experience and in-depth knowledge of the latest trends, Tony provides reliable product recommendations and valuable insights into cutting-edge tech. You can find more about him here.
